Week 2; Understanding sound and setting the scene for the final assessment
Week 3; Reflecting on the impact of technology in shaping the new era of music
Week 4; Testing and analysing different recording approaches
Week 5; Drums and their contribution to the birth of music genres
Week 6: What is the essence of a bassline ?
Week 7: Building a hook with leads and vocals
Week 8: Modulating depth and space with reverb
Week 9: Balancing frequencies and volumes
Week 10; The purpose of a well-structured musical arrangement
Week 11; The technical and creative side of mixing
Week 12; What is mastering basically ?
Week 2: Understanding sound and setting the scene for the final assessment
“Sound is a form of energy that propagates through a host medium in the form of longitudinal waves.”
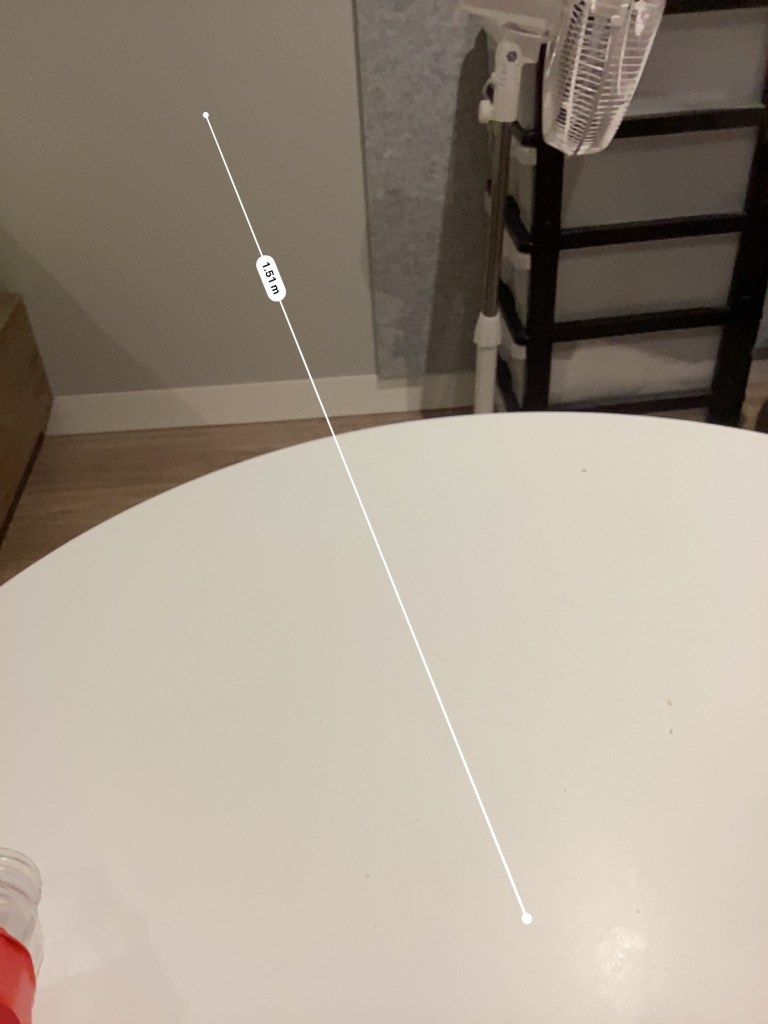
Aim of the 1st session: To construct a simple ‘sound cannon’ and use the echo time to estimate the speed of sound.
Objectives:
Assemble a simple sound cannon using a plastic cup and a balloon.
Record a slow-mo video of the sound being generated with my phone, placed at a known distance to a wall
Estimate the duration of the echo time.
Calculate the speed of the sound.
I have tried measuring the duration the pop sound takes to hit the wall (1.51m from my microphone) and bounce back again on my microphone( measuring the echo). The best time estimate is 0.73s. Using the equation speed of sound, v=d/t, v = 2(1.51m)/0.73s = 4.13 m/s, which is so clearly not the actual value. (c.f ~343 m/s in air)
Limitations in this experiment:
The distance to hit the wall was too small and the sound frequency was too low to even hear an echo
There were some obstacles along the direction of sound propagation that caused deflections.
I also could not properly measure the time as the time units on my phone video editor is limited to 0.01 s sensitivity, and the echo time for such a small distance was too small to even be accurately measured.
Aim of the 2nd session: To plan my track structure for the final assessment
I intend to produce a form of bouncy, groovy and “techy” track with some vocals that adds tension and directions to the flow.
I will be using the lyrics from the following track, but recorded in my voice. I will then produce a track using these recorded vocals and Ableton as my DAW.
The lyrics:
Deep in the faith…
In the groove…
Sway side to side, let your body move
I will update about my recording and sound design techniques throughout the upcoming blog posts. Stay tuned!
Week 3: Reflecting on the impact of technology in shaping the new era of music
This week lectures provided great insights on how the digitisation of music has led to a the emergence of new forms of innovations in music production.
The boom of electronic sound devices and Digital Audio Workstations(DAWs), levelled up the availability of gears for musicians in an affordable manner. Similarly, step-sequencers incorporated in DAWs meant that creators no longer needed to rely on front-end interfaces on drum machine or hardwares
In my attempt to measure the speed of sound in last week’s blog post, I received on feedback on how my estimation went wrong. My subject tutors pointed to the fact how frame-rate of video recordings and human error in calculation interfere with the results. A better approach would be to do this with a partner on the receiving end to detect the sound.
Week 4; Testing and analysing different recording approaches
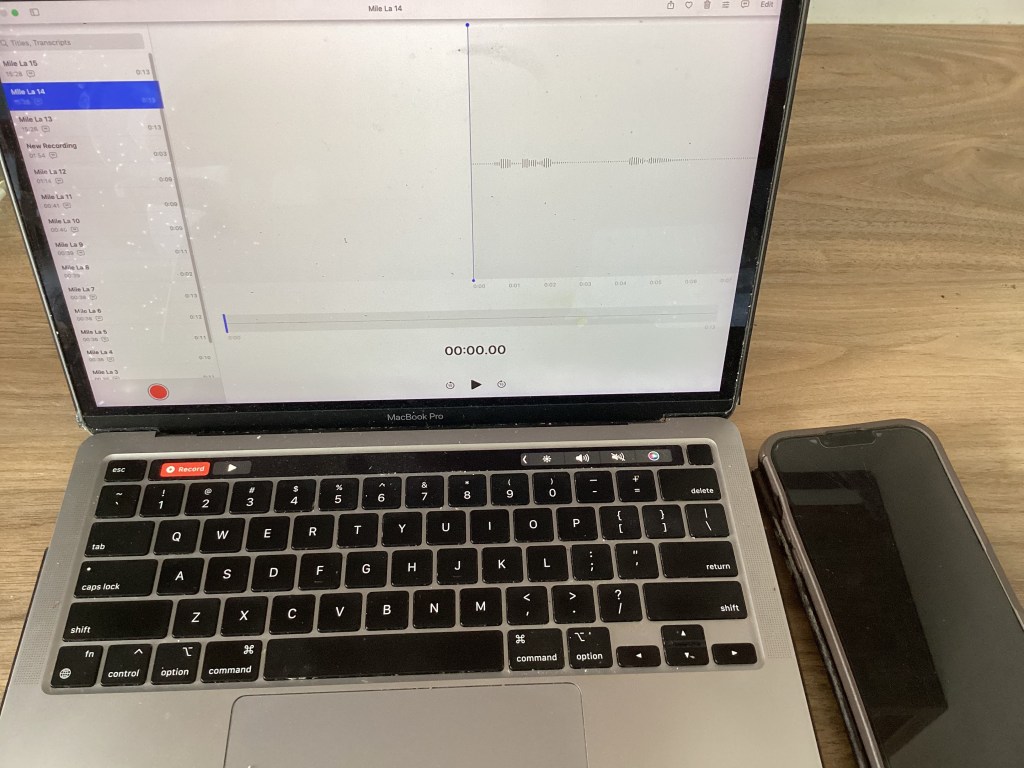
Aim of the session: To select for a clean vocal recording sample using my iPhone mic and macbook in-built microphone.
For each device, I will use the same (apple native) recorder app – Voice memos.
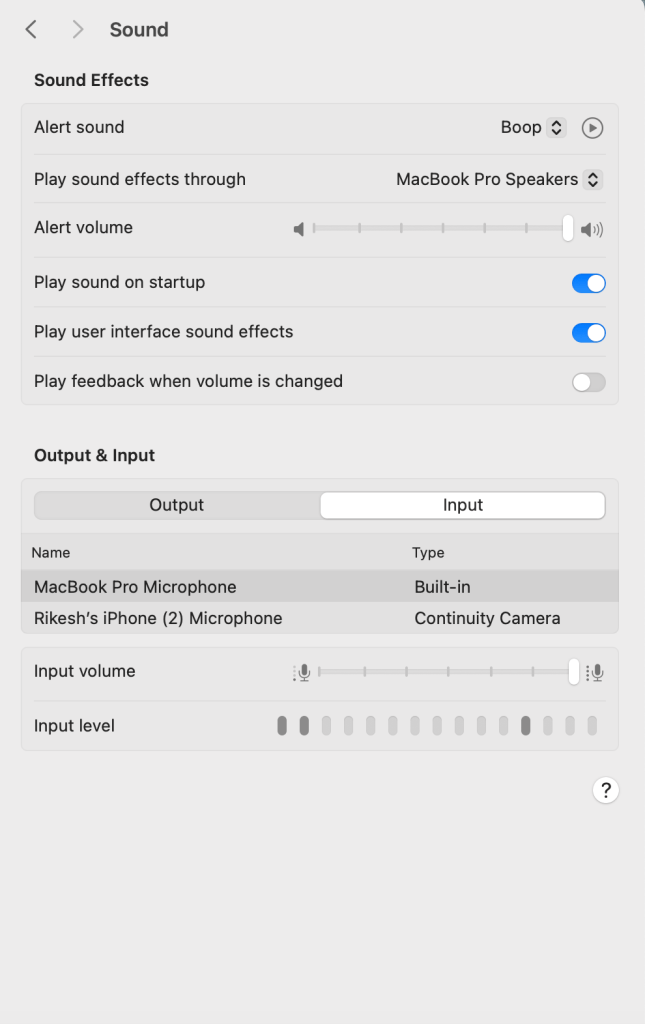
First, I explore the recording quality of macbook in-built microphone. The room I am recording is more or less quiet, with some sudden noises from the surroundings as I live in a student accommodation. Below is a raw recording sample from my macbook mic, while sitting at my desk, about 55 cm away from the mic.
Here is the audio waveform of the first recording sample, with the default mic level.
The peaks are not too high, and the sound level is rather uniform during moments of speaking. There is also minimal capturing of the surrounding ambience. To confirm that I am not lacking in terms of voice quality/timbre, I proceeded with a recording whereby the mic-level is adjusted to two notches or so from the maximum after which I analysed the signal-to-noise ratio in both macbook recording samples.
Below is a sample with mic-level adjusted, and positioned about 30cm from the source.
This is the corresponding waveform.
After listening carefully, it appears that the second recording offers a much clearer and more audible output of the sound, however, background noises and clicks from my mousepad to stop the recording can now be heard much more.
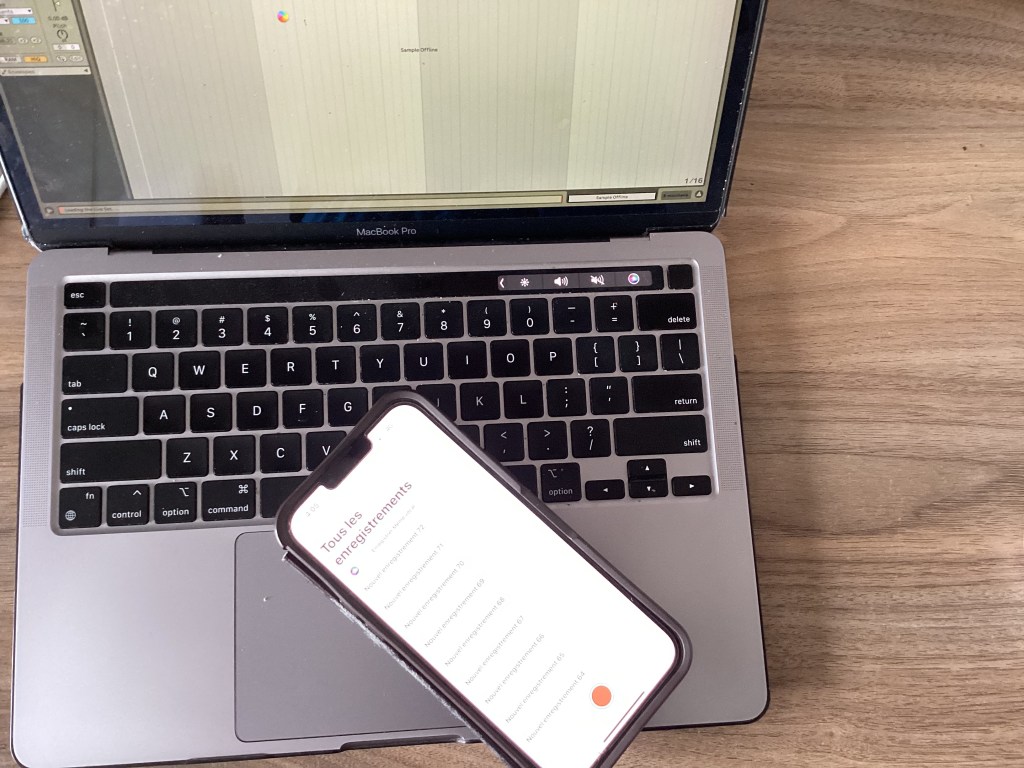
Next, recording is carried out from my iPhone mic (using native “Voice memos”) with no adjustments at all.
Below is the raw iPhone audio recording waveform.
It appears that my iPhone default mic level is high enough to pick some background noises.
It seems that I cannot alter the iPhone mic level, but this time, I position the mic ~30 cm from the source.
Choosing the sample that maximises the desired audio source over unwanted background noises is an essential step in producing an accurate and clean reproduction of the original sound source. This allows room for additional effects and manipulations during the post-processing phase, such as using gates, eqing, or slicing techniques.
Interestingly, I noticed that both the iPhone and macbook records in mono.
After this session, I feel that the signal-to-noise ratio is better when recording from my macbook in-built mic. The macbook mic also gives me flexibility to adjust the mic level, which seems to be restricted on my iPhone settings. Moreover, the quality of sound from this room can be described as dry, and I like it as I am able to control the level of reverb or echo more precisely aftwerwards
Perhaps, experimenting more with mic-positioning, a different recording space or better hydration before singing might give new perspectives in future macbook recordings.
I will also process the samples in Ableton in the upcoming blogs. Stay tuned!
Week 5; Drums and their contribution to the birth of music genres
Imagine a Rock concert or Dance Music festival without the sounds of drums. That would surely be a terrible place to be for music enthusiasts.
Beats, from simple to complex, act as a focal point in evoking the characteristic rhythm that gives music genres their distinctive feel. From the classical backbeat influencing the 50’s-70s’ pop era to the pulsating groove of electronic dance music(EDM), focus is attributed differently on the drum notes. While the backbeat emphasises on the 1st and 3rd notes, the upbeat is a shift on the 2nd and4th notes, which changes the “drum-feel”. This is interesting; just like during reading our brain first recognises letters, our brain also decodes music into its individual elements to sequentially form an overall perception – the music experience. Musicians exploit this in their drum patterns to give birth to new music genres, breaking off the conventions.
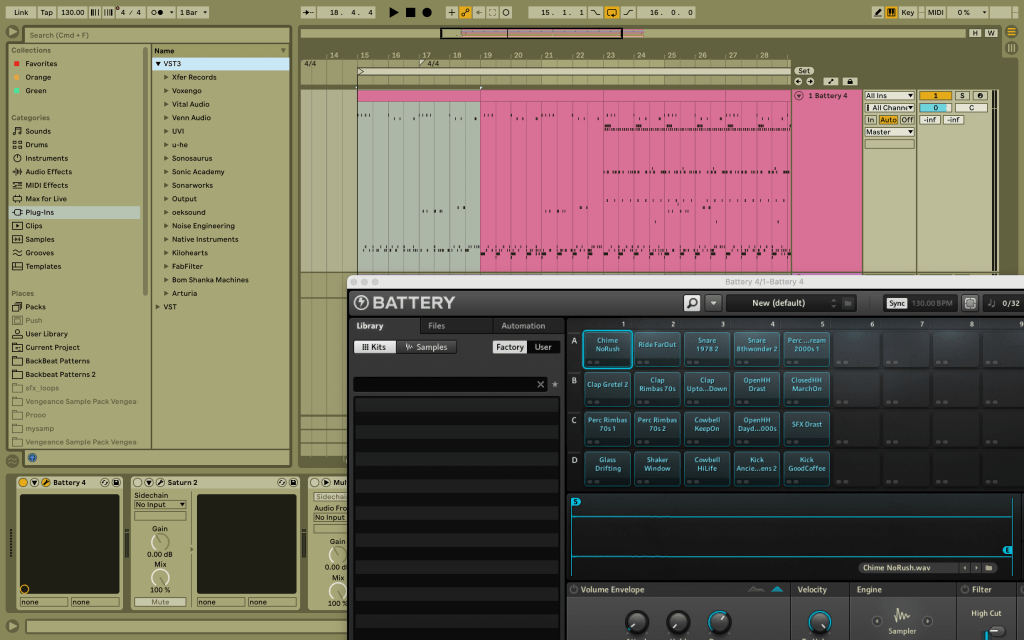
This week I was really inspired by the backbeat, featured in the lecture. It felt completely fresh to my ears, which are familiar to the 4/4. To really get in the groove, I experiment with “battery” by Native Instruments on Ableton to create a beat with the kick on the 1st and 3rd, and snare mainly on the 3rd, with some off-beat patterns.
This is an audio only with kick, layered snare and some off-beat claps, as shown in the screenshot below.
Now, I include the ride, with a focus on the 1st and 3rd notes.
Finally, I include some running closed hi-hats and some off-beat open hi-hat to add space and enhance the rhythm.
In regards to my final assessment, I will focus on the 4/4 beat, with additive percussions, such as in the reference track listed below.
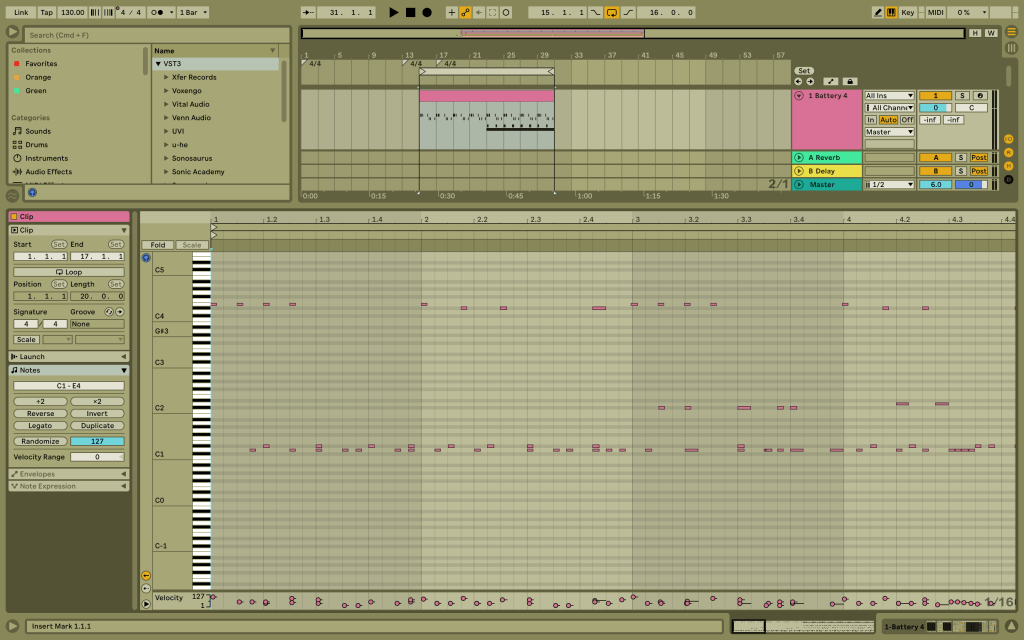
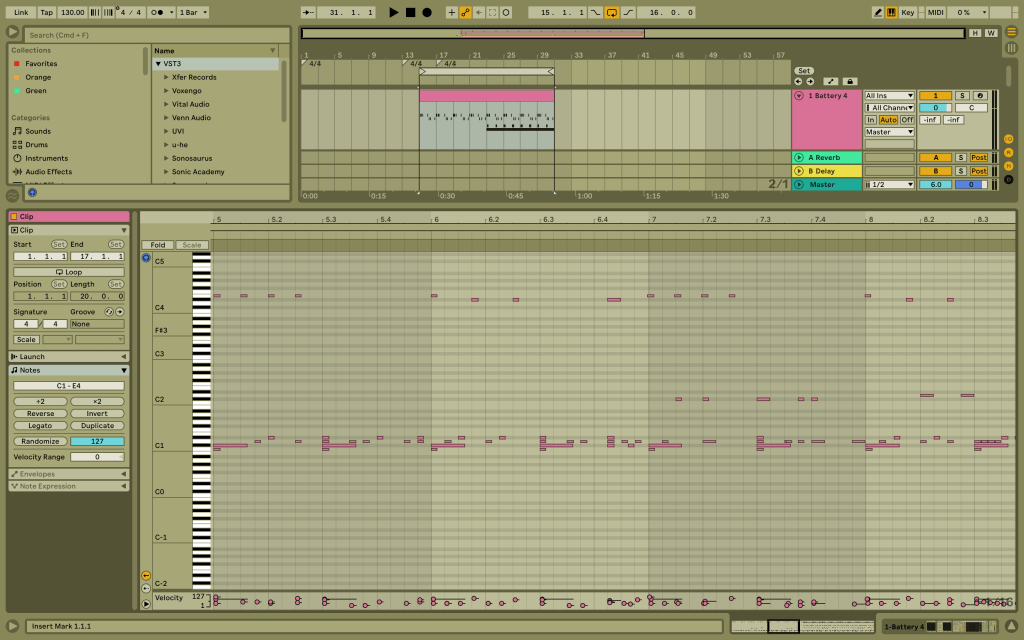
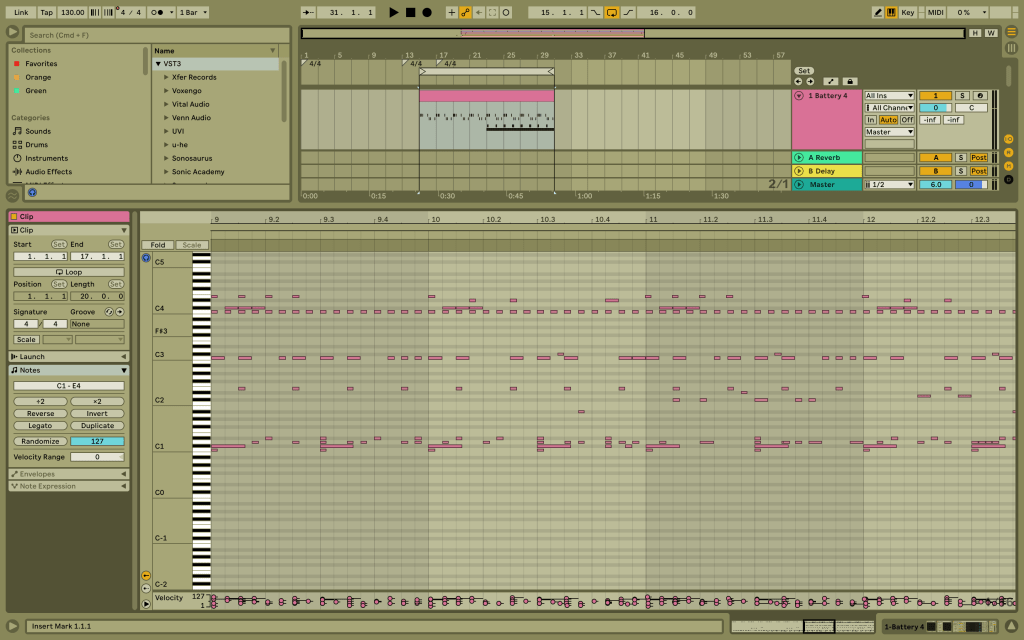
Week 6: What is the essence of a bassline ?
This week provided insights about another fundamental element of the rhythmic section of a track – the bass. With its double-edge features , it can be varied to develop both the rhythmic and harmonic foundations of a track. Bassline patterns are diverse, ranging from simple repetitions, oftentimes used in electronic music, to complex improvised and experimental takes as in live music concerts.The advent of synthesizer plugins has definitely changed the game in terms of easier accessibility for a wider range of producers to design and create basslines, without hardware boundaries.
In this session, I try to synthesize a techno rolling bass pattern as in the following examples:
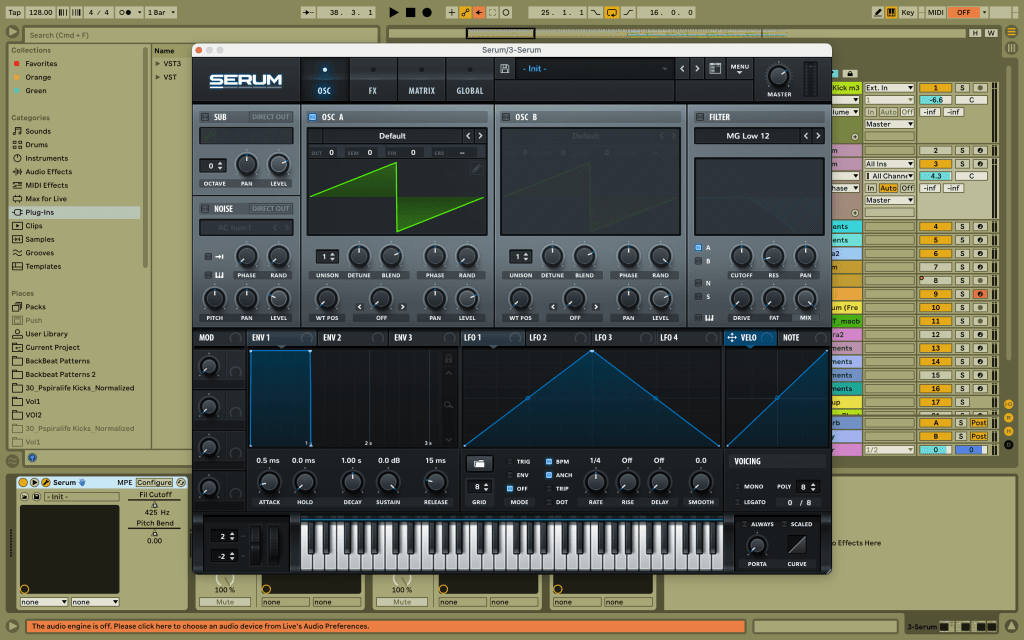
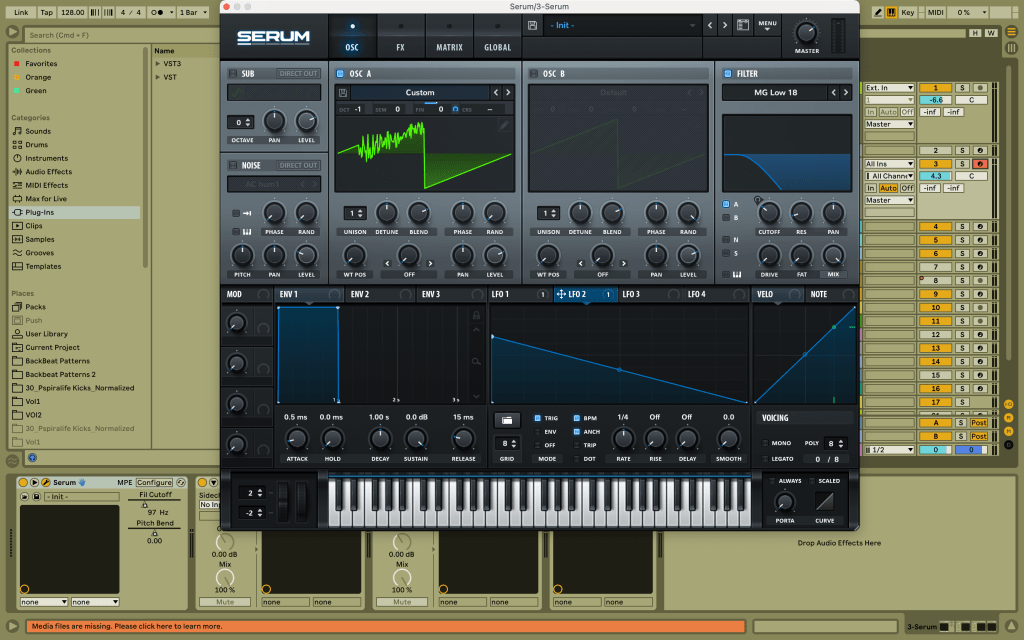
To start with, I used serum as my synth plugin and a root note of D1 in legato. I first set serum to “Init”, and set “Rand” to zero. I used one oscillator with the saw tooth wave at an octave of -1.
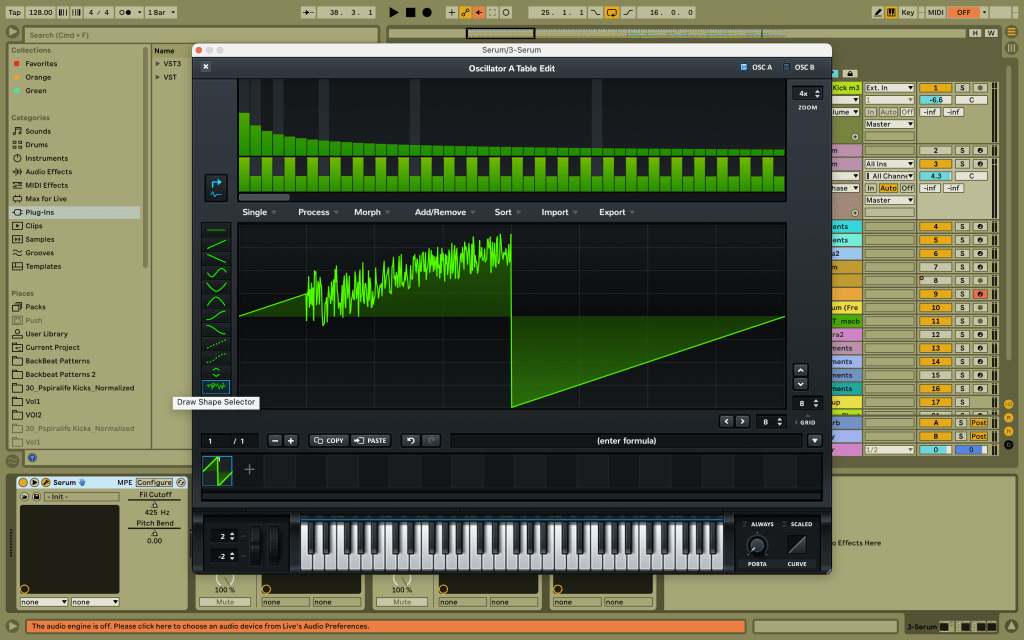
I then replaced one section(90-180 degrees) of the waveshape with a noise signal using serum’s wave editing panel to give some texture to the bass as shown below.
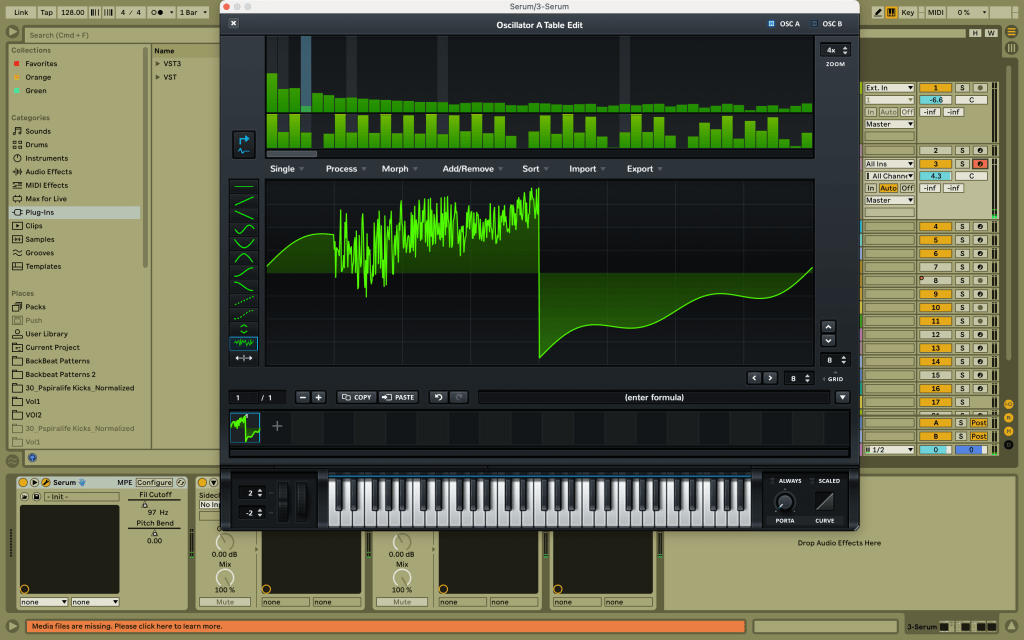
Furthermore, I opened the wave panel and boosted the second harmonic, and slightly reduced some of the fourth harmonic to give some colour.
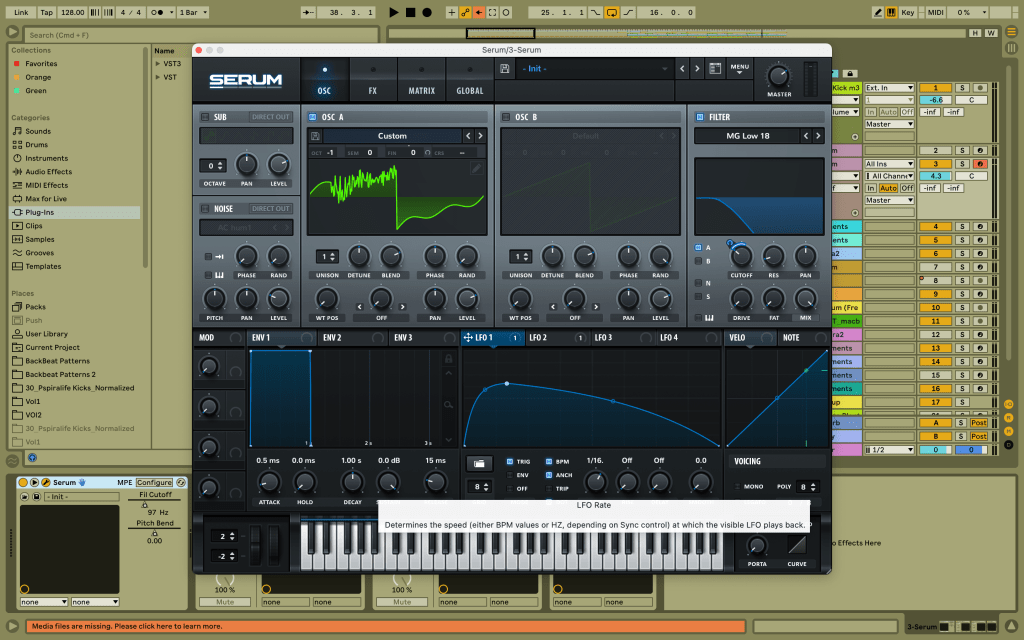
I then mapped (unipolar) a dotted LFO at 1/16. rate onto a 18db low-cut filter assigned to the oscillator. Serum LFO modulation can also act as an envelope when the “Trig” mode is enabled, meaning each time the note starts, the LFO envelope is restarted/triggered. I also edited the LFO’s envelope shape to smoothen the cut-off modulation, using it as a side-chain.
Finally, I mapped (unipolar) another LFO envelope (in “Trig” as well) at 1/4 rate onto the oscillator’s “Fine” to add some minimal variation to the pitch (fine-tuning the pitch).
The modulation matrix is also shown below.
With a 4/4 kick pattern, and a simple drum patterns with hihats and snares/claps, this is the end-result.
Week 7: The idea of a hook using vocals and leads.
This weeks explored what sets a track apart – the lead, which is generally a vocal line, but can also be some standout synths/instruments. The “Old Grey Whistle test” infers that simplicity, catchiness and repeatability of a tune are the main qualities that determine whether a music piece is a hit or not. It is important to distinguish the lead from the rest of the elements, else it might be directionless and difficult for the listener to keep track of the flow. The following tune, which I also mentioned in my Week 2 post, appeals to me, in particular for its simple and catchy vocal that keeps the listener grounded to the theme. Moreover, I like how it is of a low-pitch and dry nature, which maintains some form of tension/seriousness.
I have try to mimic this vocal line and implement it in my final track; here is the best version. However, the pitch is still high and varies a bit, and i intend to experiment transposing these to lower octaves.
This track’s vocal is also on point with the genre, locking the listener into the groove. The use of audio effects to add textures onto some parts of the vocals is interesting production technique to play with contrast.
Week 8: Modulating depth and space using reverb
This week’s content dive into the functions and aspects of adding reverb to different elements making up the track, with a focus on drums, vocals and leads, to create a sense of immersion.
Oftentimes, monophonic recordings pose as a barrier to implementing a sense of depth and space in a track. In real life, sound is much more lively and full of character as opposed to artificial/synthesized sound design. One aspect which can really give the listener’s cues about the relative spatial and temporal qualities of a sound in a given environment is the sound’s reverb. In simpler terms, sound originating from the source is not the only pathway directed to our ears, it in fact combines with reflected soundwaves on nearby surfaces to give an overall binaural effect. In music production, a mono sound, can be transformed into stereo by exploiting the features of reverb and panning as well.
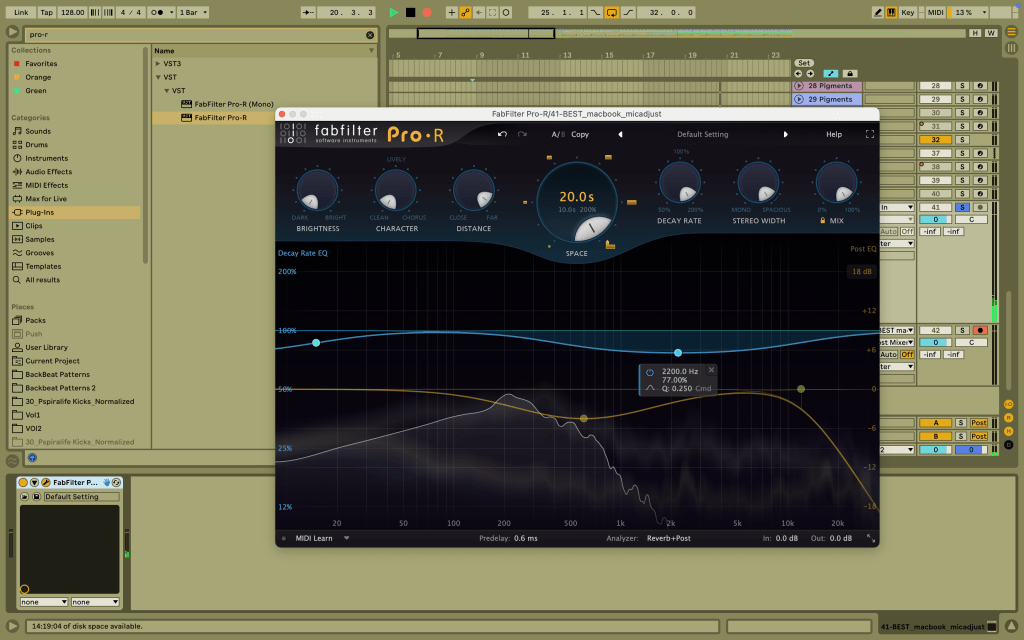
I explored these effects using Fabfilter Pro-R on a vocal recording which I will probably use in my final assignment. Below is the recording, recorded with my macbook mic. It has very minimal reflections, as the room i used for recording has limited surfaces and is small.
Next, I experimented with turning all the knobs to their maximum, while adjusting the distance to “far” as follows.
Obviously, this sounds really distant and far away, giving the impression that the source is far way from the microphone, in a large open space.
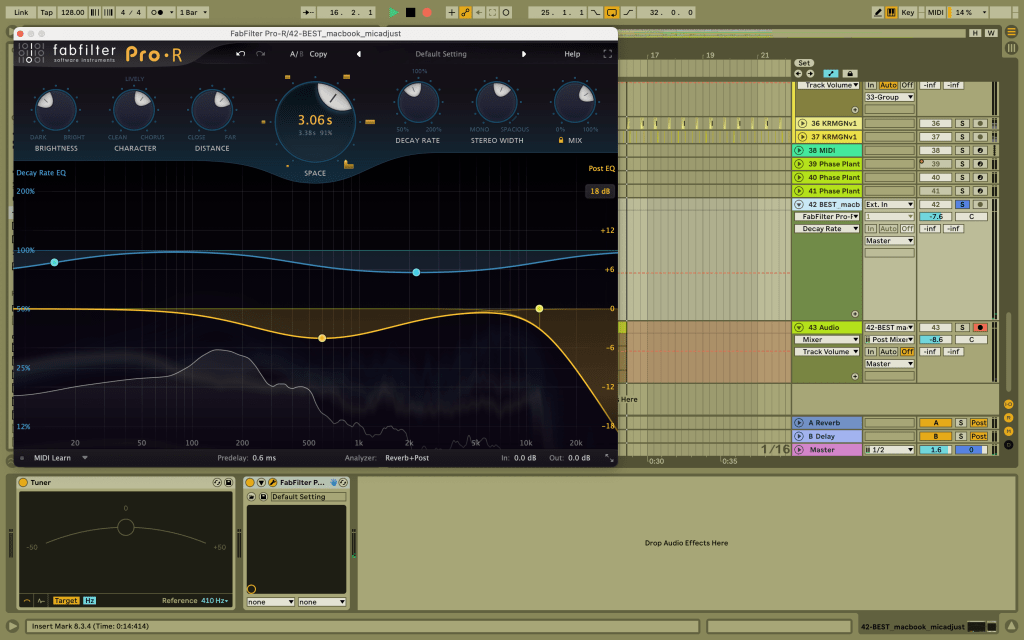
Afterwards, I then experimented with adjusting the distance, and also the dry/wet and space to produce this end result. Before doing that, I tried to adjust the pitch of the vocal to the key of my track (D), using a tuner.
This is the audio:
The vocals can be heard more clearly than the previous trial, but I feel that there the reverb is still too high and creates a sense of dissonance, which I do not want in this instance, given that this vocal serves as a hook for my track, and is intended to be mimicking real-life acoustic effects, while being easy to interpret.
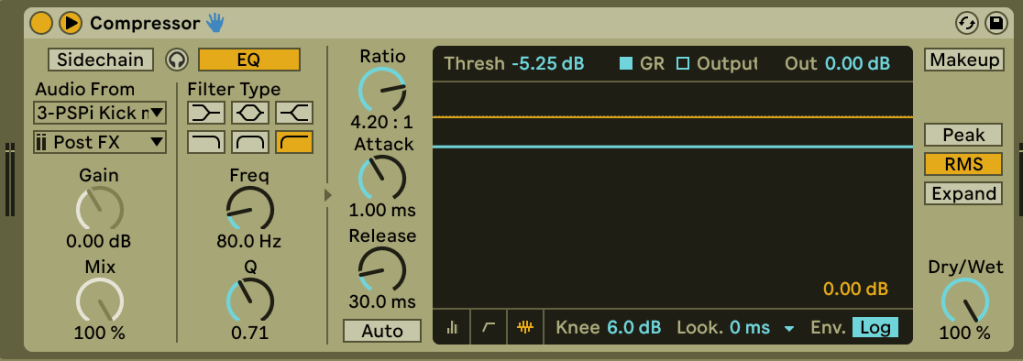
Week 9: Balancing frequencies and volumes with EQ and Dynamic range compression
At the level of sound processing, EQ and compression are fundamental tools in every track. While EQ is all about balancing the frequencies of a sound, dynamic range compression is about adjusting balance in the volume of a sound. EQ is multi-functional in its effect as it can boost certain frequency range of a sound to make it standout from the other elements, or it can be used to blend a sound in the mix so that it is not competing or clashing with other elements within a frequency spectrum. The expressivity of a music comes from its dynamic contrast, such as a live orchestra playing, which is not too limited in terms of its range of volume. In contrast, a digital recording system often comprises a limited dynamic range, imposed by the use of dynamic range compressor plugins, to enable and preserve the dynamics when played via a compact disc for example. This ensures that in all sound devices, the sound output is consistent in definition during its the highest peak and lowest level.
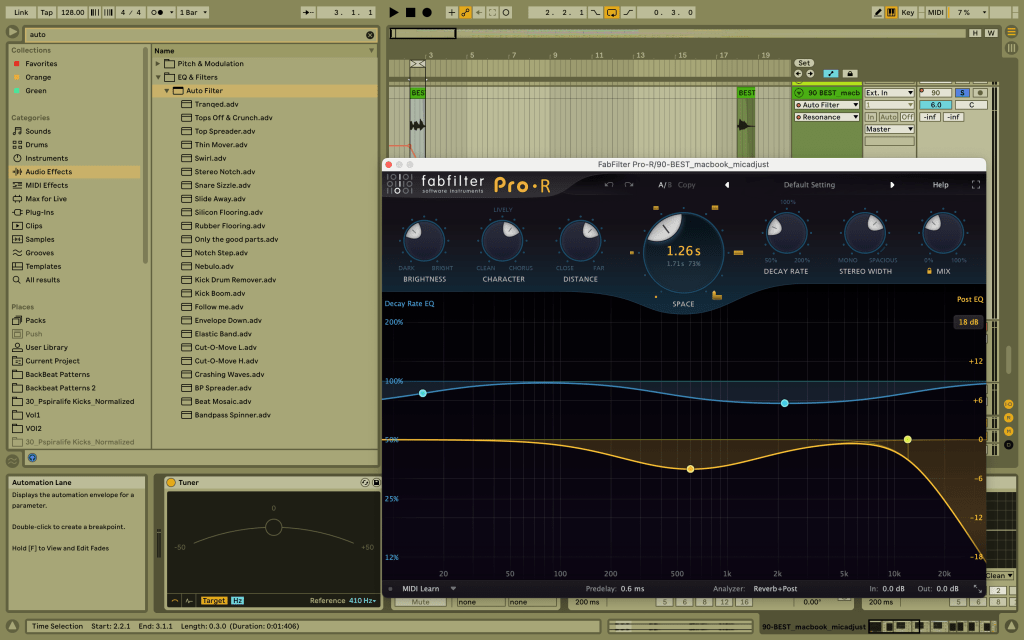
In this session, I firstly experimented with EQing of my vocal recording which I will be using for my final submission. I started by transposing my vocal to a lower octave(-7) at root D with a tuner, then applied some high pass filter to my vocal recording at around 300 Hz, to remove the low-end so as not to interfere with my kick and bass. There is also some level of reverb in it as shown in the screenshot.
I then try to mimic the sound of a telephone by completing this week’s exercise, which simply consisted of applying a band pass filter within 300 Hz to 3000 Hz. The first audio below is the the telephone feel which is so cool and inspiring, and this propelled me to play around with the rate and resonance as well, making the vocal sound like some Fx(second audio listed below). I then used this sound as basis to develop a futuristic sound by adding granular delay effects using the plugin “Portal” (third audio).
Telephone-effect:
Fx/texture-like sound:
With granular delay:
Lastly, I explored the effects of compression onto my grouped drums , using Ableton native compressor’s plugin, I noticed a subtle difference in how the clap got punchier, and how the shakers and overall drums blend into with the kick and bass.
No compression:
I then added some form of compression using these parameters settings.
With compression:
Week 10; The purpose of a well-structured musical arrangement
Arranging the different elements of a track is a musician ability to bring into sound the ideal interpretation of a musical work, how well the individual elements define and contribute to the overall track’s progress and features. This is important so as to ease the mixing phase.
In the following track, the arrangement mixdown is very interesting and catchy. The elements are introduced and arranged in such a way that keeps the listener engaged. While the kick with its hat and clap is present in almost all section of the track, the drums evolve during the peak, and changes in intensity depending on sections of the drop as it progresses. The drop stand outs with its unique loud synths, which has been definitely surgically EQed to blend it well with the kick-bass and drums so as not to cause unwanted clash in the frequency spectrum Moreover, the addition of running hats and also some build-up is created by decreasing the time between each claps in an increasing pattern. The addition of filtered synths with some lfo, each modulated at some different rate during the intro, build-up and break section adds tension as well as stereo width and tonic range to enhance a sense of space and movement. Some level of panning and sidechain compression can also be heard in one of these synths. The vocal is partly supplemented by some stabs which mimic the movement and tone of the lyrics. Furthermore, these stabs are supported by minimal percussion elements that appear during the more intense moments of the drop. It can be heard also that some of the percussion and “oneshot” vocals are panned slightly left or right.
Week 11; The technical and creative side of mixing
During this week, I was introduced to one of the areas which i find challenging yet exciting – the mixing phase. After years of listening to different music genres, it amazes me how each track has its own distinctive mixdown, focusing on blending differently the musical elements with EQing, compression, volume and panning. It is still one of my areas which i need to dedicate most of time, as it requires careful attention to the detail with an analytical mind.
This is a version of my mix of the work in progress for my final submission. It is still a rough idea, and I am still deciding on how the synths for the drop should be in relation to the bass and drums. In terms of the kick+bass, drums(without percussions) and vocals, I wanted these to be rather consistent, dominant and uniform, so they are identified prominently in the mix. There is also a repetitive synth which is layered onto the vocals during the intro, as an anchor. However, I still feel that the second set of vocals during the drop could be better mixed, so I have to spend more time with this section, experimenting more with Eqing and compression. Furthermore, some percussions introduced during the drop are meant to be slightly off-centred in panning, and far from the prominent elements. How much to pan and how far back to place elements are questions that always leave me unfulfilled in my pursuit of the ideal mix. It can be so easy to misjudge how the elements sound if they are not well mixed or even worse not properly arranged in the right context. In sum, this week demonstrated that mixing is by no means an easy task without a clear objective, whether in terms of achieving a particular genre or style, or determining how prominent key instruments and hooks should be within a track. As such, the mixing process should be approached with a relative prioritisation of the various musical elements.
Week 12; What is mastering basically ?
It has finally come down to one last blog post; what a journey it has been, and ending this blog post on the complex art of mastering could not have been a better way to do it. In short, Mastering can be defined as polishing and enhancing the final frequency and volume balance after mixing, but before releasing the track in a publishing record. This is mainly done to optimize the playable quality in all sound devices. Since it is added to one rendered stereo version of the track, it can is mostly subtle as it can easily lead to unintentional changes to some parts of the mix, as opposed to mixing should deal with the individual stem elements of the track. As such, an appropriate mixing is a solid foundation for a clean mastering output.
In my final mixdown attached below, I have made some considerable improvements notably by working on an introduction, implementing the use of risers as well as adding some pitch variation in my main synths to create movement. In my approach to finesse the overall track during the mastering phase, I intend to explore and play around with a combination of production techniques involving multiband compression, glue compressor, EQing and use of limiter as illustrated in this week’s content. Enhancing regions of brightness and minimizing “muddiness” in some sections are going to be some key focus of this session.
Final mixdown (without mastering):
On a final note, I would like to extend my thanks to the whole MUSI20174 teaching team for setting up this subject in such a way that every week introduced the evolution and meaning behind each important musical element of a track, distinguishing their differing roles and attributed feels in different musical genres. I have developed an appreciation for the numerous variations in drums feels, most of which I was unfamiliar with, and I have a new liking for in-syncopation hats, which I have tried to evoke in my final track. In this subject, I have not only developed a strong recording approach to yield a clear output using only basic equipment, but also appreciate and apply into practice the critical and technical side of sound processing. The clear and simple explanation on compression has deepened and eased my understanding of this powerful tool such that I’m now able to spot subtle differences given I understand its expected function. I am also grateful for all the amazing music suggestions listed most weeks, they have been a real treat; Herbie Hancock-head hunters is my new favourite tune – it is such a cool way to start the morning. Thank you again for all the life-long, invaluable teachings and music shared.